When I first attempted to commit to the curly lifestyle, I tried leave-in conditioner after leave-in conditioner, searching for one that a) actually had enough hold, and b) didn’t leave my hair feeling like a fried, dried-out mess after repeated use. I frequently got discouraged and went back to braids before giving it another try. I gave up entirely for months at a time. Then one day, I came home from work to find that my roommate had left her copy of The Curly Girl Handbook on the kitchen table for me.

So I read it. A lot of it was affirmation that curly hair is beautiful, with many dad-joke-worthy hair puns, but there was also a lot of good instructional stuff too. I decided to try out the “Curly Girl Method.” Basically, this involved avoiding products drying or damaging to curls, and styling and caring for them properly. It recommended using gel, which until then I had thought was intended for construction of mohawks and spiked hairdos.
I had pretty good results. I eventually hammered out a routine that worked decently well for me, keeping the things that helped and disregarding the things that did not. I didn’t really like the gel, but I accepted it as a “necessary evil,” just something I had to put up with, because I couldn’t find anything that worked as well.
There are a couple reasons I didn’t like gel:
1. It felt like putting glue in my hair. Wet gel immediately cements your hair together such that it is actually difficult and kind of painful to try to comb your fingers through your hair.
2. It takes forever to dry. You have to use a lot of gel, especially when you have long, thick hair, and until it dries fully and you can “scrunch” out the gel cast, you have the dreaded “ramen-noodle hair,” and can’t be seen in public.
3. It flakes off when dry. As you scrunch out the crunch, little particles of dried gel fill the air like snow. Some gels are better than others, but it’s inevitable.
4. Even with using CG-approved products, my hair still eventually felt fried in places, especially the top layer which is exposed to the air.
5. It creates a lot of waste. Lots of plastic containers that I know probably won’t get recycled, even after I spend so much time (and water) washing them out.
So, when I stumbled onto the concept of homemade flaxseed gel (probably on YouTube), I decided to try it out. Initially I was attracted to the idea that I could stop buying commercial gels, and stop washing those sticky containers, and it ended up working really well for me. I’ve been using flaxseed gel for a couple months now, and can say there are some additional nice benefits I wasn’t expecting.
Here are my findings:
1. It’s not sticky. It’s goopy more than anything, like putting egg whites in your hair. You can easily finger-comb it in, though since it’s also runnier, it can drip out of your hands or hair, which can get a bit messy.
2. It’s much faster to dry. I also have much less severe “ramen-noodle” hair while it does, so it just looks like my hair is wet, not glued together. The crunchiness is also much less intense, so it is much faster to “scrunch” it out with a few quick squeezes, and have nice, soft curls.
3. The hold is not as strong as commercial gel. I think this makes it look more natural, but it also doesn’t last as long, so I would have to redo it more frequently if I were less lazy.
4. Lower level of flaking. There is still some, but it’s much less than I’ve seen when I tried various commercial gels.
5. Several months in, my hair does not feel fried. Flaxseed gel is supposed to be very moisturizing, and while I’m not a scientist, I can at least confirm that it doesn’t dry my hair out.
6. No waste. This one’s obvious, since I’m making it myself and reusing containers. But it’s also so much easier to clean out of said containers when it’s used up.
7. It’s incredibly cost effective. Inflation is doing crazy things with pricing right now, but even assuming $5 for a 13-oz. bag of flaxseed, with each 1/4 c. of seeds making 2 batches of gel, and each batch of gel lasting me several weeks…I’m not going to do this math problem, but I’d say this bag is going to last me for a very long time.
8. After extracting 2 batches of gel from each dose of flaxseeds, you can use them in baked goods! They’re delicious!
So I definitely recommend giving it a try. Here’s how you do it:

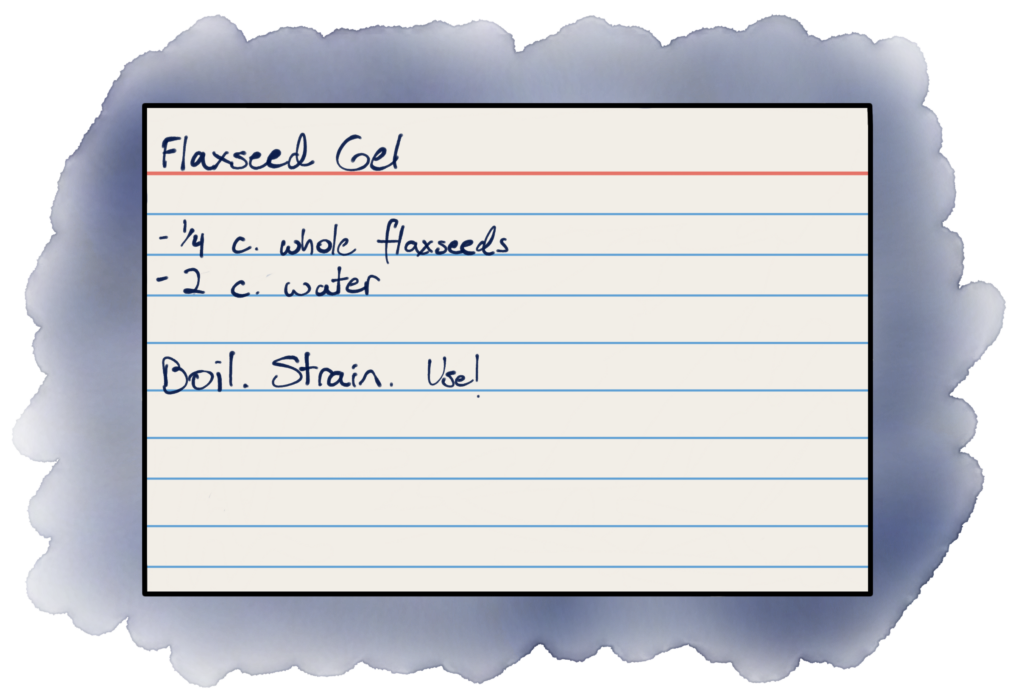
Bring 2 c. water to a boil. Add 1/4 c. flaxseeds. Cook until it starts to thicken, about 5 minutes, stirring frequently. It doesn’t need to be very thick – it will continue to thicken as it cools, and if it gets too thick, it will be harder to strain. Once it reaches the right consistency, strain immediately. Some people strain it through pantyhose so they can really squeeze out every last drop of gel, but you can also use a mesh strainer – though note that it can gum up the strainer and you can lose some of the gel, especially if you boiled it for longer. Store in the fridge (can also be frozen). Use just as you would use any other gel. Store the used seeds in the freezer – you can make another batch of gel from them when ready!